Friday, May 30, 2014

Inspiration: Removable Halter Collar Dress

I have a bad habit of stalking the new arrivals on Modcloth. It can be an expensive addiction (damn all those cute shoes!), but it also yields lots of retro dress inspiration. When this yellow check number popped up yesterday, I had to take a closer look.

The cool thing about it is the removable halter. Lots of retro dresses have removable halters, sure, but I've never seen one that buttons on at the waist. (Usually, they have hidden buttons inside the neckline.)

(Hmm, what's with the hoodie-esque drawstring ties? Do not want.)

Upon closer inspection, there seems to be vertical rows of buttons up the bodice, along where the princess lines would be.

So if you chose to remove the halter, you'd have cute decorative buttons on your now-strapless dress. (Though you'd have to be careful with that button placement to avoid unfortunate nipple-button syndrome.) There's shirring at the waistline and back. I wish I knew if there were boning--there should be, but sometimes ready-to-wear dresses rely on shirring and that gross sticky rubberized elastic to hold up a strapless dress.

The other cool thing about the design is the rockabilly-inspired halter collar. I like the dramatic proportions of the lapels.

This is giving me great ideas for ways to spice up a sundress. I'd love to try my hand at draping a removable halter collar like this one!

Thursday, May 29, 2014

Slip Sew-Along #8: Sewing the Lace at the Hem


Hello, sew-alongers! I’ve decided we’re going to skip the straps for now, and move on to the lace at the hem. But don’t worry; I’ll have a video for the straps to show you soon.

Okay, let’s get going. You need a long length of your wide stretch lace, the same stuff you used at the neckline and under the bra.

First, trim off the excess from one of the floral motifs on your lace. You want it to have a nice smooth edge around one of the flowers.


We’re going to start pinning the lace at the circle mark above the slit on the left side hem. Don’t have a circle mark? Me neither. No big deal, I consulted the pattern and you need a mark about 4.25” above the top of the cut-out wedge for the slit. Make a tiny dot there.


Pin the top of the flower motif in place so that it just covers your dot mark.


Now, pin it down the left side of the slit so that the edge of the lace is flush with the raw edge of the fabric on the slit.

When you get to the corner, fold in the excess to form a miter.


Keep pinning the lace around the bottom of the slip. 

Your lace edge is still flush with the bottom of the fabric. Go all the way around the slip until you get to the other side of the slit. Form a second miter.
Pin the lace up the right side of the slit. Temporarily remove the left side of the lace from the slit and place the end of the right side lace underneath it. Cut it off at the top, and then hide it underneath the floral motif that you trimmed down in the beginning of these instructions.


Get out a hand sewing needle and some thread. Slip stitch the fold of the miters in place, only catching the lace, not the slip underneath it.

Unpin the corners and trim away the excess from behind your slip stitching.


Pin the corners back in place. Now we’re ready to zigzag the lace all the way around the hem.

Put your machine on a square 2.5 x 2.5 zigzag stitch. Begin stitching across the top of the overlapped lace (at the top of the slit). Then stitch down the outer edge of the lace down the left side of the slit. If your lace is scalloped (like mine is) follow the scallops of the lace as you stitch as best you can. Hold the fabric slightly taut, but do not stretch it.


(Hey, check out my fancy new machine! More on that to come!)

Pivot at the top of the miters, and continue zigzagging along the upper edge of the lace.

When you get back to your starting point, backstitch and cut your threads.

Now we cut away the excess fabric. Start from behind the slit. Slash the fabric from behind the lace and cut it away next to the zigzag stitching. See how your slit forms an overlap?


Cut away the fabric all the way around, trimming closely to the zigzag.


And you’re done with the lace hem!


Friday, May 23, 2014

Adding Underwires to a Bustier-Style Bodice


This has got to be one of my most frequently asked questions: how do you put underwires into a dress? (Especially one like my bombshell dress or other bustier-style design.) Is it possible? To be honest, I really didn't know. So I decided to spend some time exploring the possibility while making B6019, my Butterick Shaheen-style dress pattern. You'll need a pattern with a underbust seam and, ideally, some sort of bra cup seaming.

This pattern is ideal because it has a bodice lining. The underwires will get stitched to the lining only, so that the stitching lines don't show on the outside. If you wanted to put underwires into an unlined bodice, it would need to have actual bra cups (that are the shape of an underwire) or you would have to not care about underwire stitching lines.

Here's how I started. Construct the bodice front lining and add boning channels where desired. Practice positioning the underwires and see if you're happy with how they fit by holding the bodice up to your torso. The underwires should not extend past the top of the neckline. (Tip: you can remove underwires from a worn out bra to avoid having to buy them--plus you'll know they're the right size!)


Place the underwires into channeling. (If you don't have channeling, 1/4" wide bias tape could work in a pinch.)


Mark the underwire placement. It's very important to remember that the underwires will expand when worn. See how I'm stretching them slightly open with my hand in the picture above? This is how you want to mark the placement. Add some chalk lines while stretching the underwire open so you know where to stitch the channeling. The bottom of the underwire should match the underbust seam.


Remove the underwires from the channeling and pin the channeling in place along your marked chalk lines. Stitch along each side of the channeling.


Put the underwire back into the channel and secure the open ends of the channel with stitching. Repeat on the other side of the bust.

Prepare the outer bodice front. I put fusible fleece in the cups for support and woven interfacing in the midriff.


Complete the bodice as usual. Here's how the underwired lining looks from the inside.


I ended up adding some thin circular bra pads between the layers for a little extra oomph--the upper cup was collapsing a bit on my smallish bust (sad, I know). 

And here's the outside!

You want support? This thing is super supportive! Plus it has elastic shirring in the back to hold it snug to the body, and a halter strap for a little extra lift.

Hope this is helpful! Do you all have any other tips for sewing underwires into a dress?

P.S. This method would work for a swimsuit too!

P.P.S. I'll be back with the sew-along on Monday! I'm going to do a video to show y'all how to make bra straps.


Thursday, May 15, 2014

Thread Tip: Light Grey as a Neutral


Did you know that pale grey thread blends with tons of colors? I first learned this from my mom; I think it's some sort of top secret quilting knowledge. I put it to use recently in my lingerie sewing. With my slip pattern, there's contrast lace trim all over the place. It can be annoying to try to match thread colors, because you have to keep switching from your main to your contrast color depending on if you're sewing the fabric or lace.

Enter grey thread! It seems like magic, but it blends seamlessly with both bright white lace and lavender fabric. Here it is on the lace side--there's a large zigzag on both the top and bottom of the lace, but you can't see it at all.


And here it is from the back.

It's like a chameleon! I'm using Mettler Meterosene color 0854, also called "Saturn."

Grey thread works for all sorts of lighter-colored fabrics. Give it a try!

Monday, May 12, 2014

Slip Sew-Along #7: Sewing the Front and Back

And we're back! Sorry for the pause; I was having some technical difficulties. I lost some files and had to start my slip from the beginning. The bright side is that now you can see the slip in a different color! This is the lavender slip kit (also available in plus/tall size).

Okay, so the last thing we did was to put the bra together.

Now, get out your slip front. It's the piece that has the wedge-shaped cutout on the left thigh. Cut a length of lace to match the upper edge of the piece. Lay the lace on the piece so that the edge of the lace matches the raw edge of the fabric. If one side of your lace is more scalloped than the other, you'll want the scallops pointing down.


Pin the lace in place and stitch along the lower edge. Use a "square zigzag" (about 2.5 long by 2.5 wide) and follow the scallops with your stitching. The easiest way to do this is to hold the fabric taut from in front of and behind the presser foot, and steer the fabric as you go.

Using a small pair of scissors, cut away the fabric from behind the lace.


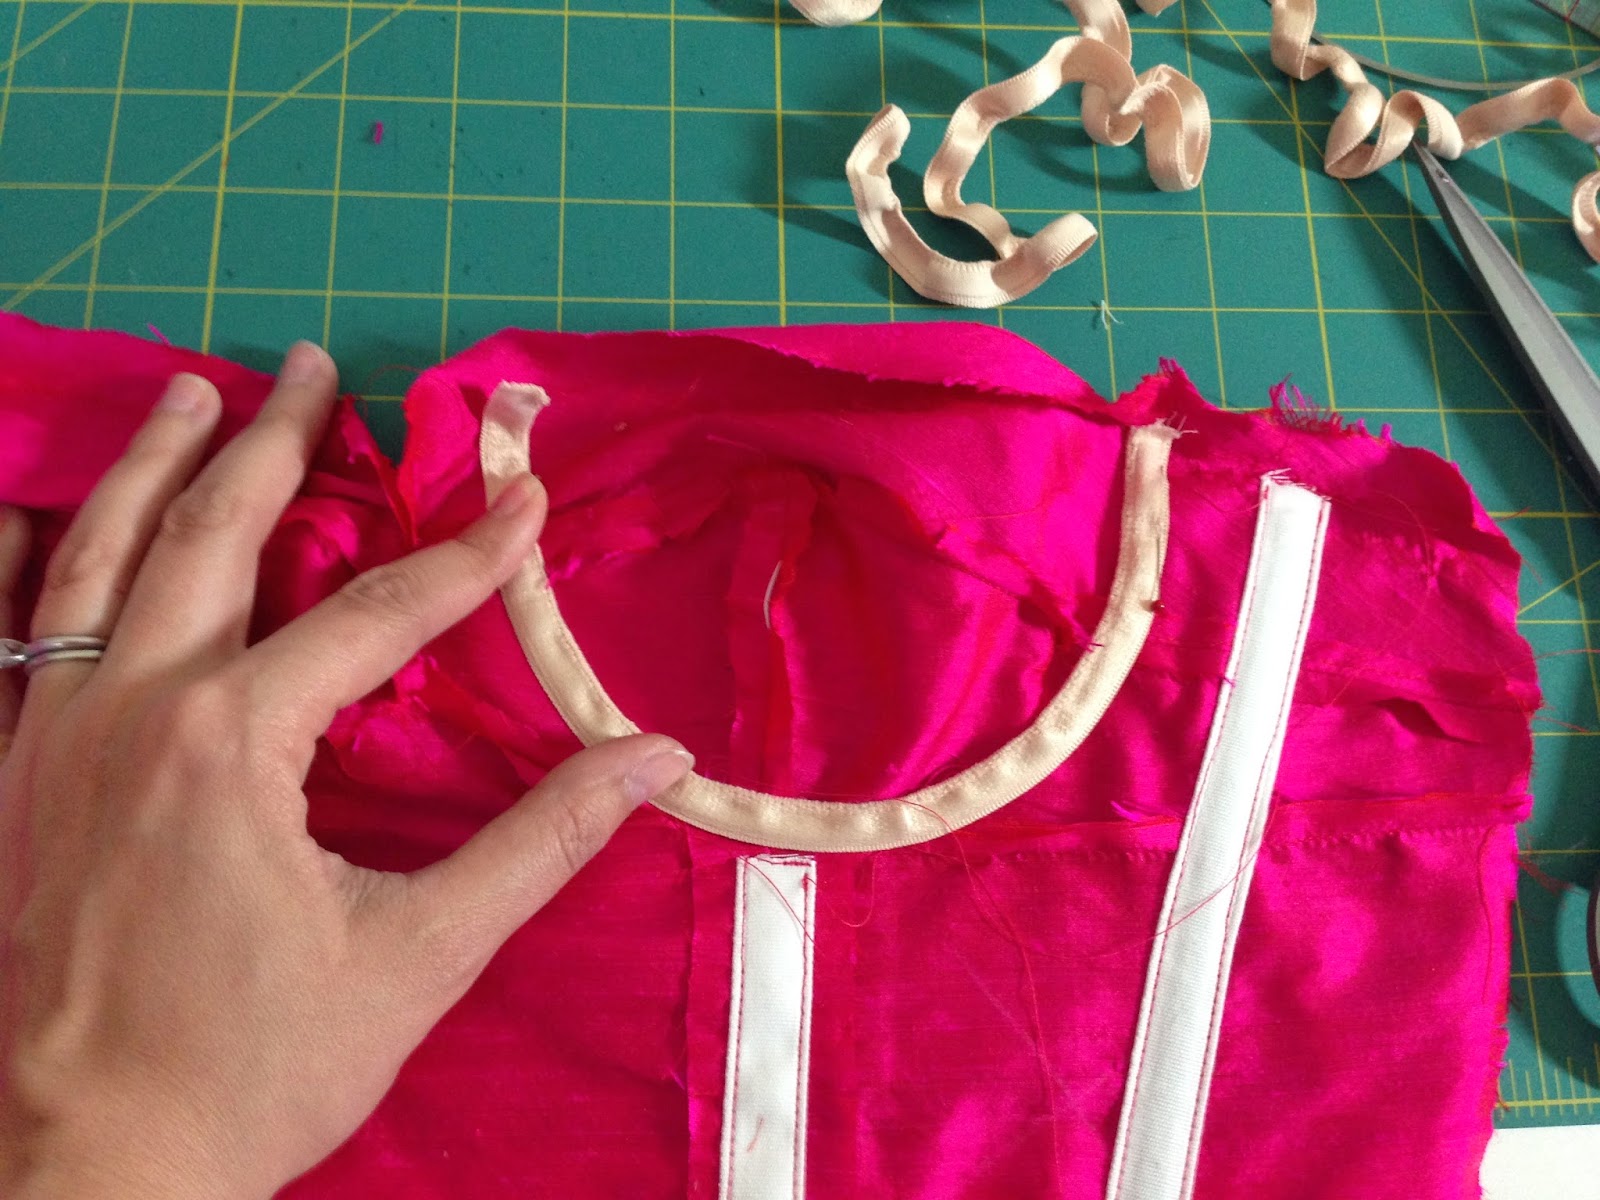
Now get out your bra piece again.

With right sides up, lay the slip front over the bra piece so that they overlap by 1/4". Pin in place. Zigzag in place:

Now your lace is stitched at the top and the bottom.
It looks like this on the inside:


Now get out the slip back piece, elastic guide #6, and your picot-edge elastic (that's the elastic with the small scallops on one side). Cut the elastic to your size, as indicated on piece #6.

Lay the slip back out with the right side facing up. Place the elastic at the top of the piece, with the scallops facing down (the wrong side of the elastic is facing up). Pin in place at either end of the back piece. The elastic will be smaller than the back piece.

Using your square zigzag, stitch the elastic to the slip back, close to the scalloped edge. Stretch the elastic to fit as you sew. (It's easiest to use both hands and stretch from the front and the back of the presser foot.)


Next, flip the elastic to the wrong side of the slip back. From the inside, stitch again, positioning your presser foot so that the center of the foot is along the bottom edge of the elastic.

One side of the zigzag will fall to the left of the elastic, and the other to the right of it. Stretch as you sew.

The scalloped edge of the picot elastic will show on the right side.

Now it's time to sew the side seams! With right sides together, pin the slip front to the slip back.

When matching up the pieces, use your notches as a guide. However, the most important thing is that the pieces match at the top at the seam allowance. Do not match the raw edges together at the top.


Stitch with a wobble stitch (about 1 mm long and 2.5 long) at 5/8". Stitch again just to the inside of that stitching line, in the seam allowance. Trim close to your second line of stitching.

Now your front is sewn to your back!


Next we'll move on to the straps!

Previous sew-along posts:

Slip Sew-Along #1: Inside the Kit, Plus Other Supplies

Slip Sew-Along #2: Pre-treating Your Fabric
Slip Sew-Along #3: Picking a Size and Making Adjustments
Slip Sew-Along #4: Bust Adjustments
Slip Sew-Along #5: Cutting and Marking
Slip Sew-Along #6: Sewing the Bra Top
© Gertie's Blog For Better Sewing. Powered by Cake