

This has got to be one of my most frequently asked questions: how do you put underwires into a dress? (Especially one like my bombshell dress or other bustier-style design.) Is it possible? To be honest, I really didn't know. So I decided to spend some time exploring the possibility while making B6019, my Butterick Shaheen-style dress pattern. You'll need a pattern with a underbust seam and, ideally, some sort of bra cup seaming.
This pattern is ideal because it has a bodice lining. The underwires will get stitched to the lining only, so that the stitching lines don't show on the outside. If you wanted to put underwires into an unlined bodice, it would need to have actual bra cups (that are the shape of an underwire) or you would have to not care about underwire stitching lines.
Here's how I started. Construct the bodice front lining and add boning channels where desired. Practice positioning the underwires and see if you're happy with how they fit by holding the bodice up to your torso. The underwires should not extend past the top of the neckline. (Tip: you can remove underwires from a worn out bra to avoid having to buy them--plus you'll know they're the right size!)

Place the underwires into channeling. (If you don't have channeling, 1/4" wide bias tape could work in a pinch.)

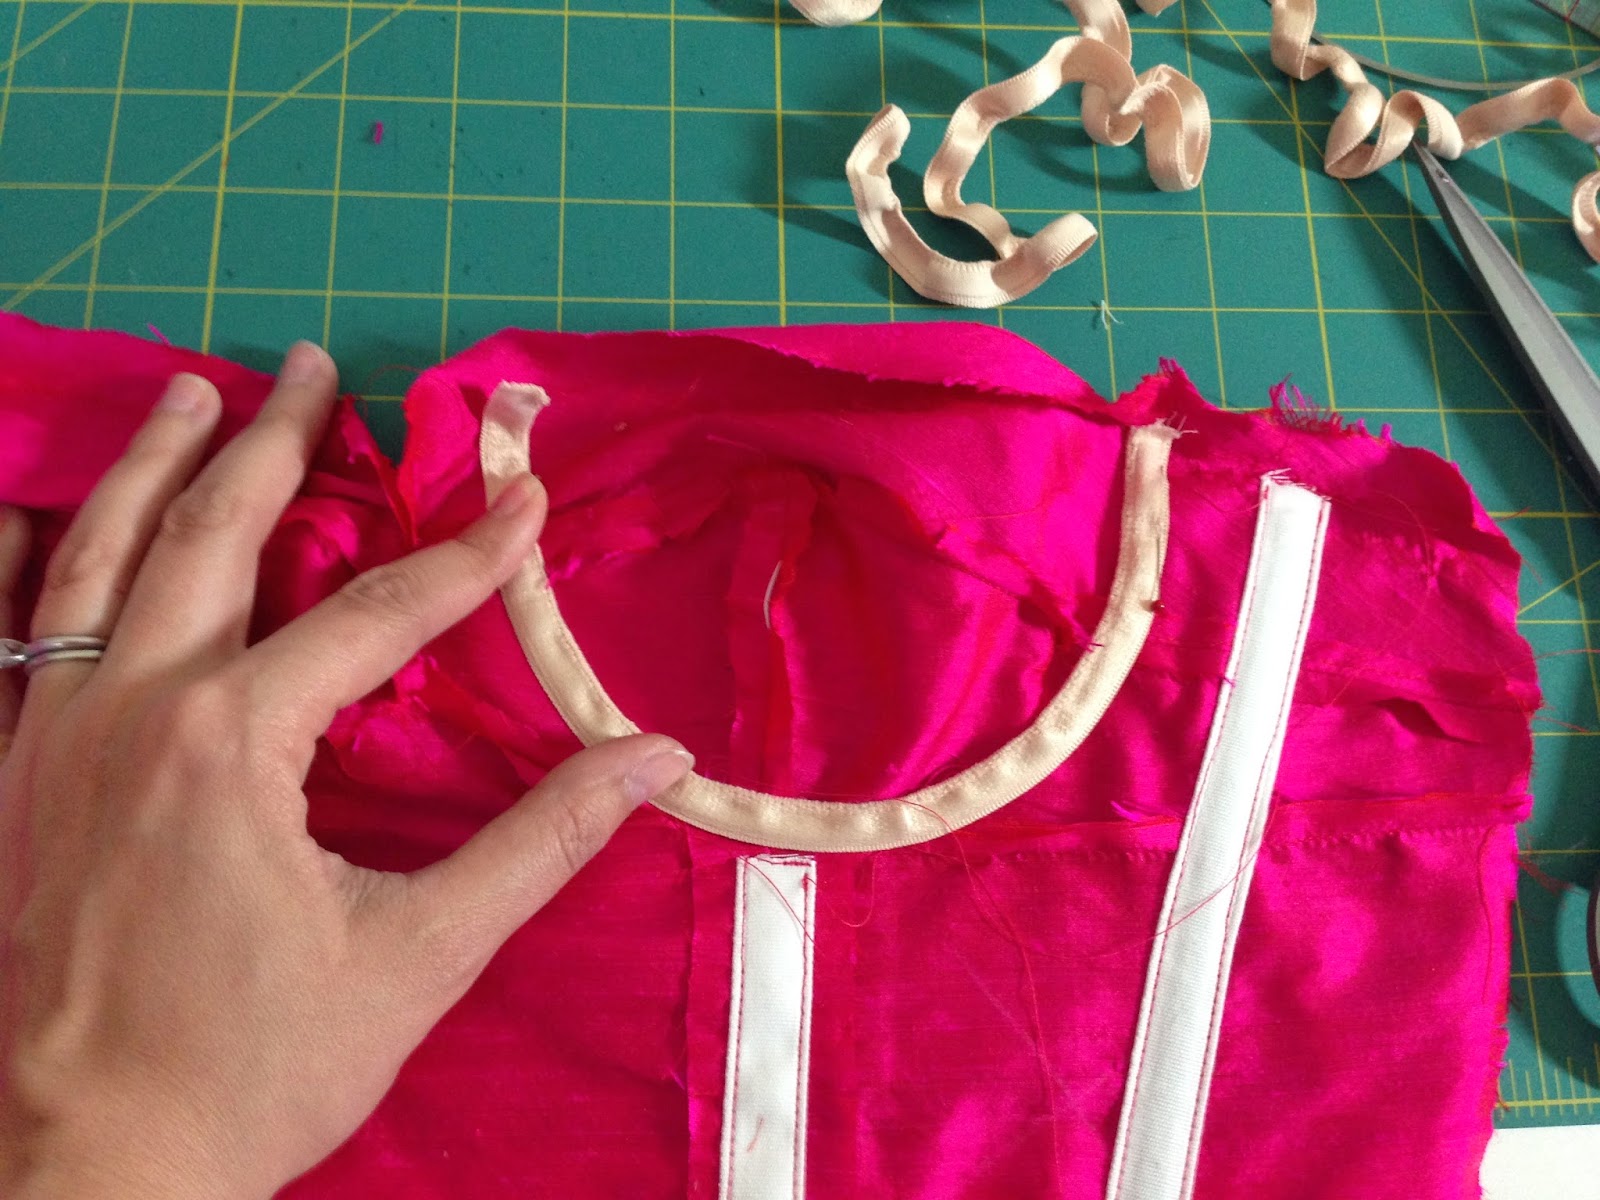
Mark the underwire placement. It's very important to remember that the underwires will expand when worn. See how I'm stretching them slightly open with my hand in the picture above? This is how you want to mark the placement. Add some chalk lines while stretching the underwire open so you know where to stitch the channeling. The bottom of the underwire should match the underbust seam.
Remove the underwires from the channeling and pin the channeling in place along your marked chalk lines. Stitch along each side of the channeling.

Put the underwire back into the channel and secure the open ends of the channel with stitching. Repeat on the other side of the bust.


Complete the bodice as usual. Here's how the underwired lining looks from the inside.

I ended up adding some thin circular bra pads between the layers for a little extra oomph--the upper cup was collapsing a bit on my smallish bust (sad, I know).


Hope this is helpful! Do you all have any other tips for sewing underwires into a dress?
P.S. This method would work for a swimsuit too!
P.P.S. I'll be back with the sew-along on Monday! I'm going to do a video to show y'all how to make bra straps.

This is fantastic! I've been needing this information for dance leotards and swimsuits. Thanks so much!
ReplyDeleteThis is so great! I've been gathering as much information as i can I'm hopes it will help me make my wedding dress and this post is so helpful! I think I'll use this pattern for the front of my bodice.
ReplyDeleteGreat post gertie, I have just been thinking how to do this. Thanks.
ReplyDeleteWow! That looks gorgeous! I've always wondered how to do that. Now I have to go Pin this so I can find it again when I need it! Thanks for explaining this stuff.
ReplyDeleteI bought a fancy bridesmaid dress as my wedding dress, and it had built in bra cups. It was so supportive! It also fit like a glove, so even though it was strapless I had no fears about it falling down. It's good to know I can make one on my own too!
ReplyDeleteThank you, thank you, THANK YOU!! I bought a retro style swimsuit that I love but the bust needs more support. This is SO helpful! Love you Gertie!!
ReplyDeleteThank you for doing the experimenting for us - and providing a tutorial!
ReplyDeleteBeautiful!
ReplyDelete¡Qué buena pinta tiene! me gusta. BESICOS.
ReplyDeleteThis is genius! So helpful and the result is fabulous :)
ReplyDeleteSo brilliantly practical, as usual!
ReplyDeleteGertie you are a breath of fresh air in a polluted world.
That's BRILLIANT! Thanks so much Gertie! Personally I have too much of my own padding ;-) and have always shied away from this style of bodice thinking there's no way I could make it work, but this looks just the thing! And wow, how gorgeous does yours look on the the inside as well as the outside?? Amazing.
ReplyDeleteGenius. Thanks for the info.
ReplyDeleteLOVELY! and the color is amazing!!!
ReplyDeleteThats looks amazing hun
ReplyDeleteI have never do that and I want to sew a bathing suit with a good support, I know I need to practice a lot! . I want to see your dress finished, it looks so pretty!!
ReplyDeleteGreat post! Excellent techniques. I will be sending my fans here for sure. :)
ReplyDeleteI am currently working on this 6019 pattern now and loving it! This tutorial has been so helpful in constructing the top, :).
ReplyDeleteI tried using this technique to put underwires into the Soma Swimsuit by Papercut Patterns. I didn't quite nail it, but that was because of my inexperience. You have to start somewhere, though, right? Thank you so much for posting this. It was so hard to find the info. I needed. Here is the post, in case you are interested: https://patternandbranch.wordpress.com/2015/06/25/summerswimsuits-soma-bathing-suit-hack/
ReplyDeleteHi Gertie, Is there anyway to buy bombshell dress videos please?
ReplyDeleteOH GOD thank you so much!!! I am making this dress to use for a comicon and am having the worst time with the bust, mostly because I was granted with far to much. Putting underwire in it is going to be amazing!! Thank you thank you thank you so very very much....Did I say thank you lol
ReplyDelete