All right, my pretties! Here it is, at long long last: a tutorial for doing a full bust adjustment for my pattern
Butterick 5882, otherwise known as a shelf bust dress. This is going to be a long post, so hang in there.
As I wrote in
this post, I think this style could work for a larger bust since the mid-bust seaming minimizes the overall appearance of the bust (as well as making things look perky!).
Here's my version, see how the shelf bust starts at mid-bust?
Okay, on to the tutorial! Let me start by saying that there is no "one size fits all" approach to this since this dress requires a very precise fit. I'll take you through the process of how I fit the muslin on a padded dress form (I would estimate her bra size at a D cup or a bit more).
Here's the size 14 muslin, pre-FBA, pre-padded dress form so you can see the fit.
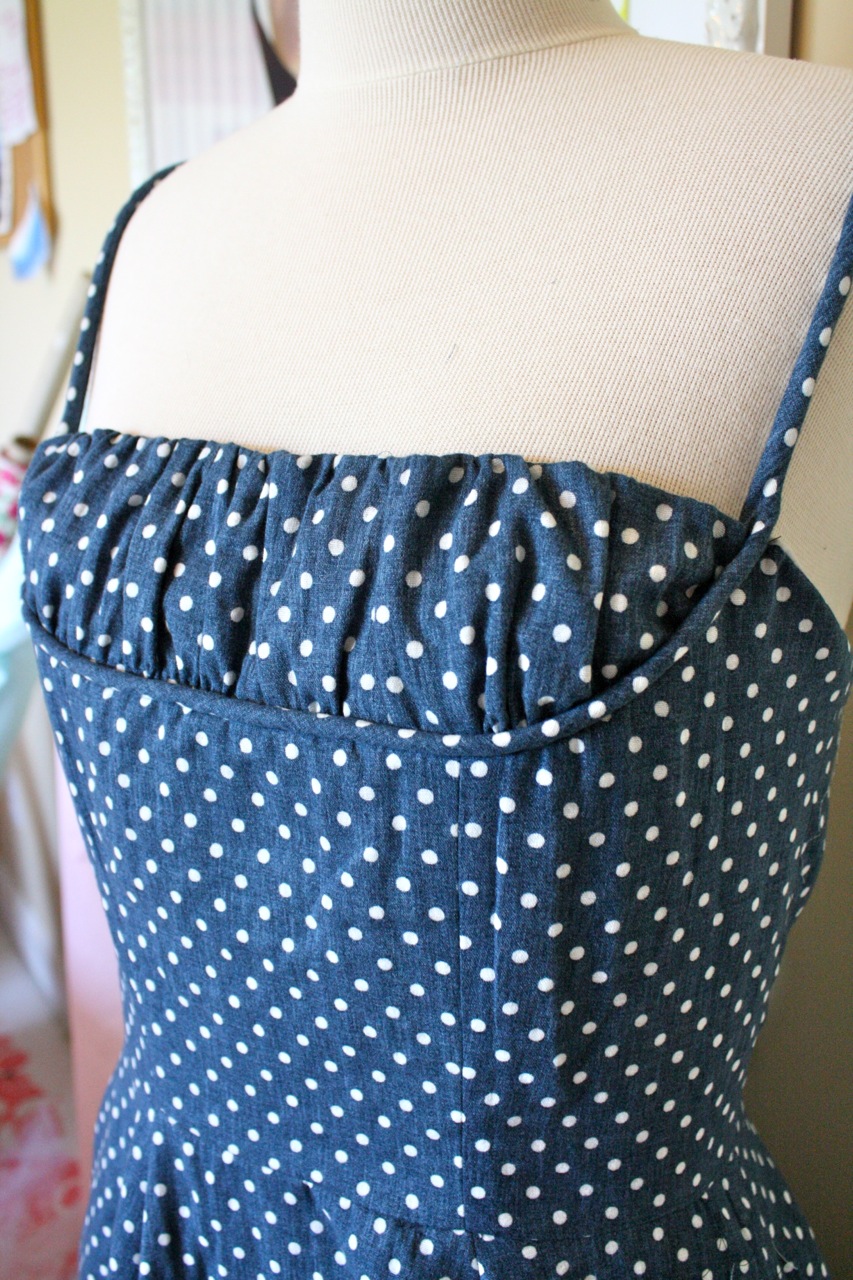
Now here it is with the bust padded out.
You can see a myriad of problems: the dress is not covering the bust, the side seams are pulled forward, and the back zipper won't close.
First, I measured the distance needed at the bust. The back gap was my indicator here, though you could go by pattern measurements compared to your own.
My mannequin needs two inches added. Obviously, we need to add this at the bust, not at the back or side seams.
These next pictures are meant to give you a visual of the changes needed. I opened up the underbust seam and then ripped out the stitches in the front princess seams.
The princess gaps are 1" each, which together adds up to the 2" we need to gain.
Now the upper bust pieces need to be made bigger to match. To demo this, I cut into the pleated inset section and the bias band below it.
Besides the extra room at the princess seams, this FBA also requires extra length in the bust. See how the midbust seam is spreading open in the photo above? I decided to also add 1" of length (see changes below.)
Okay, let's translate this to the flat pattern.
1. First, I added 1/2" to the center front bodice (which is one half of the princess seam).
2. Next, I added that extra length to the top of the pattern piece, tapering down to the original center front.
3. Repeat on the bodice side front.
4. Now, get out the "stay" piece. Slash and down the center, leaving a hinge at the top. Spread the pieces apart 1".
Add 1/2" to the bottom of this piece for extra length in the bust.
I also moved the dart back to its original position.
5. Now for the most complicated piece, the "bra." It has a ton of pleats and looks scary, but it isn't too bad to adjust. Slash and spread as you did for the stay piece.
Always re-draw the grain line and smooth out and rough edges caused in the process.
Adding length is the tricky part. You need to fold and pin all those pleats as they'll be sewn, after taping the pattern piece to a larger clean sheet of paper.
Add 1/2" to the bottom of the piece, tapering up to nothing at the right side.
Cut out the pattern piece with the pleats still folded.
Unfold and your new cutting lines are magically revealed!
Note: if you have to add a lot of length to the bottom of the pleated piece, I would recommend adding another pleat on each side (by slashing and spreading) to continue the pleats down to the bottom of the piece.
6. The last piece to adjust is the strap, which is the bias inset below the pleats. It needs to gain 1" at each princess seam to fit the adjusted pattern pieces. Between center front and the pattern notches, slash and spread the pattern 1" on each side, adding new tissue paper behing the slash.
7. Now it's time to test in muslin. I sewed up the lower bodice and did a quick fitting. There was a lot of bagginess below the bust.
I pinned this excess into the princess seams, contouring the seams below the bust.
This resulted in a new seamline, shown in pink below.
The muslin fit much better with that adjustment.
8. Construct the shelf inset portion of the bust, as well as the bias strap. Assemble everything together, sewing it to the bodice back and basting in a long zipper for fitting. Add boning for the fitting (see my tips
here!).
Well, the great news is that the bodice now fits overall, closing perfectly in the back. I did notice some excess bunching in the lower part of the pleated bra part, however. So I ripped that portion out, and scooted it slightly down into the bodice. Much better!
There you have it, readers. I hope you've found this helpful!


.jpg)


